Monday, June 27, 2016

The Scrapbook Store - Step by Step Tutorial - Blue Fern Studios Tranquility LO

Hi everyone,  today I am sharing my step by step layout tutorial created for The Scrapbook Store using the beautiful Blue Fern Studios‘Tranquility’ Collection and inspired by the Blue Fern Studios June Sketch Challenge.  

Why not pop in to the store to see the full range of papers from this beautiful collection and while you’re there check out all other stunning Blue Fern goodies, a few if which I have used here on my layout.

You will find all the materials used to create this layout at The Scrapbook Store along with a couple of other items from your stash.

Love Life
I have created a mirror image of the sketch challenge for my layout.

Step by step instructions

Mix a small amount of the Lindy’s Stamp Gang Bonjour Butter mica powder from the Tres Chic Magicals Set with a palette knife into some Golden Soft Gel Medium to create a pale yellow paste (it’s better to add a small amount and then add more if you need to adjust the colour)

Using the Dusty Attic Lace Stencil apply the pale yellow medium to the Blue Fern Tranquility 'Contentment’ pp as shown in photo.  Dry off.


Randomly stamp over the masked area with the Kaisercraft Laugh Texture Stamp or a background stamp of your choice in Ranger Cornflower Blue Archival ink, then flick over with White Kaiser Mist.

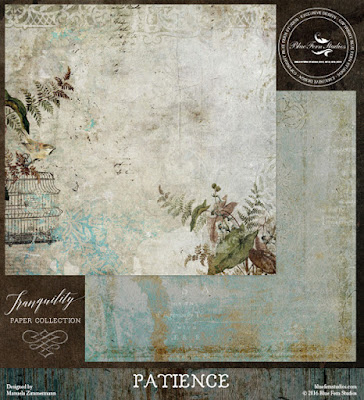
Fussy cut the floral sections as shown in photo from the Blue Fern Tranquility ‘Calm’ pp.  Fussy cut the little bird from the Blue Fern Tranquility ‘Patience’ pp.

Recycle the packaging from the Blue Fern Chunky Words chipboard pack by tearing into 2 pieces on a diagonal, then stamp with the Stampendous Cosmos Spray in Cornflower Blue ink.  Ink around the edges of the torn sections.  Mix a little of the Bonjour Butter Magicals with water on a craft mat and paint the centres of the flowers with a brush.

Stamp the key image in Cornflower Blue Ranger Archival Ink from the Blue Fern Key to my Heart Stamp Set on the left over piece of the ‘Calm’ paper, then cut around the stamped image.

Diecut two of the Memory Box Leafy Branch die from American Crafts Peapod Cardstock.

Apply Cobalt Viva Inka Gold paste with fingertip to the Prima Shabby Chic Baroque Frame to make the scrolls stand out.

Cut the Green Tara Jute Lattice Trim down the middle, then trim off the top section to create a lacy fringe as shown in the photo.

Coat the Blue Fern Love Life chipboard words from the Chunky Words Pack with Ranger Buttercup Liquid Pearls by applying with your fingertip.

Using the photo as a guide, adhere a section of scalloped lace across the bottom of your layout.  Adhere the section of jute trim over the top of the lace.

Cut your photo down to size and adhere to the back of the resin frame.

Using foam tape, layer the fussy cut, diecut, stamped sections and flowers around your photo to create depth.

Adhere the chipboard title near the bottom of your layout as shown in the photo.


TSS Products Used:

Other product: flowers, lace

Hope you enjoyed my step by step tutorial.  Happy crafting and thanks for stopping by :)
Sunday, June 26, 2016

The Scrapbook Store - Blue Fern Studios Tranquility Masculine Layout

Hi everyone,

This month the lovely Suzanne from The Scrapbook Store sent me the beautiful Blue Fern Studios 'Tranquility' Collection in my parcel of goodies.

Normally I would have gravitated towards a feminine layout with this paper range, but I decided to push myself a little and picked out the  'Jubilation' weather board pp which has a gorgeous grungy feel to it and is perfect for a masculine page.

Extraordinary
To start, I cut strips from the 'Blissful', 'Serenity' and 'Patience' pps, picking out the cream and brown grungy tones and overlayed them vertically and horizontally.  To soften and give a distressed look I applied gesso over the strips with a credit card.
Next I masked over the strips with the Dusty Attic Distressed Grid stencil and Viva Inka Gold in Aquarmarine.

For an overall grungy look, I randomly stamped over the top with the Blue Fern Coarse Fabrics stamp set and various Tim Holtz masculine stamps using archival inks in cobalt, watering can and black.  I also stamped around my the edges of my background with the Kaisercraft Film Edges texture stamp to create a border.
To add a bit more contrast, I mixed a little bit of Copper Inka Gold with water and flicked over my background using a small fan brush.  I also used the Copper Inka Gold to colour my metal embellishments, by applying small amounts with my fingertip and rubbing into the embellishments.
My chipboard frame and wooden title were altered by coating with Viva Inka Gold in Graphite, then flicked over with the watered down Copper Inka Gold.

After adhering my photo and embellishments I applied cobalt micro beads in random spots over the strippy sections to create a bit more texture and grunge.
And there you have it a masculine layout using what you might think is a very feminine range of patterned papers.

TSS Products Used:
Tim Holtz – Clear Stamp Set – French Memories
Other product: Prima mechanicals, wooden title

Thanks so much for stopping by :)


Friday, June 17, 2016

The Scrapbook Store - Blue Fern Studios 'Tranquility'

Hi Everyone,

I have my 2nd layout of the month to share for The Scrapbook Store created with the beautiful Blue Fern Studios 'Tranquility' Collection.

Picture Perfect

I was attracted to the sweet poppies from the 'Serenity' pp and went straight for my scissors for a bit of fussy cutting to create elements to layer around my photo of Brittany.  I used the creamy centre of the pp to diecut the Spellbinders lacey frame to add to my layers.


To create my background I stencilled diagonally across the 'Peaceful' pp with Faber Castell Whipped Spackle using the Tim Holtz flourish stencil which is one of my all time favs!! then misted over the top with Lindys Starburst Bougainvillea Fuchsia mist.

For added depth and dimension, I flicked over with Lindys Rusty Lantern Lime, My Mojito Green and Antique Gold Kaisermist. then highlighted the masked flourishes with Berry Nice Prills.


I wanted a bit of greenery to add to my fussy cut flower, so I diecut the Native Flourish Kaisercraft Decorative Die several times from Kaisercraft Olive Textured Cardstock, then misted with the Lindys Rusty Lantern Lime and My Mohito Green and highlighted with touches of Wake Me Up Before You Go Gold to create a mottled effect.


I love Viva Inka Gold to alter metal charms and have used the copper on my butterfly, which I topped with a Petaloo Teastained Butterfly and a little heart charm.


TSS Products Used:
Other Product: Spellbinders Card Creator Die, Kaisercraft Be Yourself Word Pack Decorative Die, metal charms, lace

Thanks so much for stopping by :)


Thursday, June 9, 2016

The Scrapbook Store - Blue Fern Tranquility

Hi Everyone,

This month for The Scrapbook Store, I get to play with the beautiful new Blue Fern 'Tranquility' collection.  This range has a lovely vintage/shabby feel to it in neutrals and soft muted colours with a beautiful range of damask, floral and weathered pp's.

For my first DT layout I chose a couple of the cream and soft brown pp's from the collection to go with this gorgeous photo of my nephew's newborn baby.  


I tore and layered the papers with some corrugated cardstock. which I coated with Liquitex gesso and accented the pp's by spraying the background denim Kaisermist.


I mixed modeling paste with a spray of antique gold Kaisermist, and a touch of coffee Kaisermist which I stencilled over my background with the Tim Holtz Burlap stencil.  Once dry, I sponged over lightly with gesso to soften, then flicked over with Pearlex brilliant gold and white Kaisermist to highlight.

Kaisermists

Tim Holtz Burlap Stencil

To create a frame for my photo I fussy cut one of the labels from the Calling Cards pp.  I also fussy cut the peaceful label for my title.  The greenery was fussy cut from the Patience pp and layered with some of the new Mini Lillies in white and Green Tara Gardenias.

TSS Mini Lillies - White

Blue Fern - Tranquility pp's


TSS Products Used:

Other Product: metal embellishments, Prima flowers

Thanks so much for stopping by :)

Wednesday, June 1, 2016

Kaisercraft DT - June Creations with Boho Dreams and Just Landed

Hi everyone, Cathy here sharing my creations for Kaisercraft today, with this month’s newly released collections – the fun and funky ‘Boho Dreams’ and the fabulous travel themed ‘Just Landed’ range.

First up is ‘Boho Chic’ and I have created a layout and 2 cards with this Collection, using a fresh and crisp white background to accent the pretty mint green and peach papers from this gorgeous range.

“Chase Your Dreams”
My beautiful Brittany has recently updated her look by chopping off all her luscious locks.  I have to admit, I was a bit upset at the thought of her cutting off her gorgeous hair, but it does suit her! A new look, to coincide with the new direction and changes in her life at the moment.
I love combining peach and mint green together, and when accented with white, you create a lovely fresh and crisp feel.  To create a bit of dimension I tore and layered my pp’s, then added some stamped elements, which I softened by flicking over with Apple and Peach Kaisermist.

Boho Dreams Stamp Set


I am totally in love with the Large Flourishes Decorative Die… just perfect to create a touch of greenery to add to your flower clusters!!

Kaisercraft Product:  Boho Dreams – Paper – P2107 Feathers, P2108 Young, P2114 Adventurer | SS315 12x12 Sticker Sheet | CT858 Collectables | CS266 Boho Dreams Stamp Set | CS853 Texture Stamp – Flutter | DD757 Decorative Die – Large Flourishes | Kaisermists – KM117 Apple, KM107 Peach | IP719 Ink Pad – Black | T331 Sanding Block | T303 Foam Tape |

I have created 2 pretty cards with matching envelopes, again using the peach, mint green and white colour combo.

“Kind Heart”
OMG how gorgeous are the feather elements in this range… to die for!!  I tied a length of the Natural String around the feathers from the 12x12 Sticker Sheet and knotted the ends.  I then added a couple of the fussy cut feathers from the Dreamcatcher pp to the ends to create the illusion of movement.

Boho Dreams 12x12 Sticker Sheet


Kaisercraft Product:  Boho Dreams – Paper – P2106 Dreamcatcher | PP999 6.5” Paper Pad | SS315 12x12 Sticker Sheet | EM406 String Natural | CD511 C6 Card Pack – White | T303 Foam Tape |

“Always in my Heart”
I was drawn to the boho girl in the pack of matching Collectables and decided to use her to create my 2nd card.  To make her pop I backed her with the tag from new Thank You Tag Decorative Die which I topped with a Natural String bow.  

Decorative Die - Thank You Tag
I have also used the new Tiny Hearts Embossing Folder which I sanded back to accent the hearts and tie in with the sentiment on my card.  The boho girl is actually holding a camera, so to keep to the heart theme, I backed the wooden Heart Flourish with pp and covered the camera… isn’t she just so sweet!!

Embossing Folder - Tiny Hearts


Kaisercraft Product:  Boho Dreams – PP999 6.5” Paper Pad | CT858 Collectables | SS315 12x12 Sticker Sheet | DD376 Decorative Die – Thank You Tag | EF243 Embossing Folder – Tiny Hearts | FL439 Flourish Pack – Flourish Hearts | EM406 String Natural | CD511 C6 Card Pack – White | T331 Sanding Block | T303 Foam Tape |

My son Luke recently went overseas to Japan and I have been meaning to scrap some of his holiday pics, so when the ‘Just Landed’ collection showed up in my parcel of goodies, I was thrilled!

“Big City Fun"
I love a black and white colour combo, but couldn’t resist adding a hint of fun colour to the Subway pp, by colouring in the station stops with gel pens in a few vibrant primary colours.  Keep a look out for the release of new Kaisercraft Gel Pens in July.  They will come in a set of 48 gorgeous colours, packs of 12 colours or single pens, so you can choose the colours you would use most!!

Kaisercraft Gel Pens

Kaisercraft Product:   Just Landed - Paper – P2101 Polaroids, P2102 Subway, P2103 Sign Posts, P2015 Passports | SS314 12x12 Sticker Sheet | CT857 Collectables | FL576 Flourish Pack – Travel | T303 Foam Tape | Other Product: Gel Pens

“Favourite Places"

The new co-ordinating Wooden Flourish Packs are fabulous… you get 5 of each of the 9 designs and a cute reusable container to boot!! I have used the Travel Flourish Pack, which co-ordinates with the Just Landed collection… so cute!!

Travel Flourish Pack
Kaisercraft Product:  – Just Landed - Paper – P2097 Journal, P2102 Subway, P2015 Passports | SS314 12x12 Sticker Sheet | CT857 Collectables | FL576 Flourish Pack – Travel | DD300 Decorative Dies – Film Strip | KM106 Kaisermist – Denim | Texture Stamps - CS755 Grid, CS154 Film Edges | ST909 Epoxy Stickers – Natural | PT212 Printed Tape – Arrows Black | IP719 Ink Pad – Black | T303 Foam Tape |

This Collection has a great selection of modern and vintage styled pp’s... what a bonus and so versatile!  Here I have created 2 Bon Voyage cards – one featuring the modern pp’s  and one featuring the vintage styled pp’s from the 6.5” Paper Pad.

“Bon Voyage”

Just Landed 6.5" Paper Pad

Kaisercraft Product:  – Just Landed - Paper – P2015 Passports | PP998 6.5” Paper Pad | CD102 Cardstock Weave – Licorice | DD314 Decorative Dies –Hot Air Balloons | KM106 Kaisermist – Denim | ST909 Epoxy Stickers – Natural | PT212 Printed Tape – Arrows Black | CD512 C6 Card Pack – Kraft | IP719 Ink Pad – Black | T303 Foam Tape |

“Wanderlust”
Just Landed Stamp Set
Kaisercraft Product:  – Just Landed - Paper – P2013 Sign Posts, P2015 Passports | PP998 6.5” Paper Pad | CS265 Just Landed Stamp Set | CS876 Texture Stamp – Crackle | Kaisermist - KM106 Denim, KM102 Antique Gold | CD511 C6 Card Pack – White | T303 Foam Tape | Other Product:  Ink, Fineliner Pen 


Thanks for stopping by and happy crafting J