Showing posts with label Luminarte. Show all posts

Thursday, January 2, 2014

C'est Magnifique - January Sketch Challenge

Hi Ladies,
As Guest Designer for C'est Magnifique Kit Club this month, I decided to create one of my LO's using the beautiful sketch designed by Michele Singh for this month's Challenge.

Enjoy the Journey
Couldn't help but create another LO with one of Brittany's formal photos as the blue tones in the kit were a perfect match.


I altered the gingham pp by embossing and highlighting with Azurite silks to add some texture.  The Blue Fern chipboard title was carefully cut apart and altered with Viva white croco crackling.  Once dry I highlighted the edges with Azurite silks.
You can create different shades of  colour by mixing the paints and powders together and you can soften the colours by mixing in some white paint. The beautiful Blue Fern chipboard butterfly was altered by painting with Luminarte products from the mixed media kit and the edges were highlighted with silver microbeads.  To make the butterfly stand out from the blue background, I layered a white diecut butterfly underneath and topped the centre with a recycled pearl earring.

The Heidi Swapp frame, pretty Prima flowers and metal embellishment were highlighted with Luminarte products from the Mixed Media Kit.  I also used some of the Luminarte primary elements powders to create mists for my masked background.

Items used on this LO: January Kit, Mixed Media Kit - Luminarte silks and primary elements, Prima tag and metal embellishment, Embellishment Add On - Heidi Swapp frames, Luminarte Azurite Silk,  Flower Add On,
Items from my stash: silver microbeads, velvet leaves, Martha Stewart pansy and heart border punches, Prima poppies stencil, Kaisercraft stamp, gesso, Melissa Frances embossing folder, Memory Box b'fly die, Viva white Croco Crackling, recycled pearl and bling earrings, crochet doilies.

Challenge Details
The sketch challenge is open to everyone and you may use any supplies you have. You do not need to be a member of our kit club to participate. Feel free to flip or rotate the sketch, but we do want to look at your layout and tell that you used the sketch. 

We will be awarding two prizes. The winners will be selected by a random draw. The first prize is this collection of paper, chipboard, and embellishments. The winner of the prize package will also be able to shop in the C'est Magnifique Store, and have their purchases sent with the prize package, so that means you won't have to pay for shipping.


  Our second prize, a $10 gift certificate to the C'est Magnifique Store, will be awarded randomly to one of our participants who obviously uses one of our kits to
create their Sketch Challenge layout. 

We will also chose 5 (or maybe more) layouts to feature on our blog!
You have the entire month of January to submit your layout.

What do you have to do to enter our sketch challenge?

1. You must be a follower of our blog. It's easy to become follower -see the left sidebar.

2. Create a layout using the sketch, and add it to our blog using the Inlinkz tool below. Please link to the blog post where you have uploaded your layout (not your general blog address). If you do not have a blog, you may link to an online gallery.

Deadline for entering the sketch challenge is midnight, January 31, 2014 (US time).
 Have fun with the sketch. We can't wait to see how you use it!   Click on the link HERE to see the  gorgeous creations for the sketch from the Design Team.

I also have 2 shabby chic cards to share, one in pink tones and one in blue tones.
Delight


Cherish
Items used on this LO: January Kit,  Embellishment Add On - Heidi Swapp frames, pink rose trim, Mixed Media Kit -  Prima tickets, Flower Add On,
Items from my stash: paper leaves, Martha Stewart punch, Prima and Kaisercraft stamps,Versamagic and Tim Holtz inks, gesso, recycled bling jewellery, paper doily, thread

Thanks so much for stopping by.

Tuesday, December 31, 2013

C'est Magnifique Kit Club - January Guest Designer

Hi Everyone,

So excited to be invited as the Guest Designer for C'est Magnifique Kit Club for the month of January.  I have always admired these gorgeous kits and was in heaven creating with this month's delicious "The Height of Chic" kit which is perfect for my shabby chic scrapbooking style.

As well as the  main kit you are able to purchase flower, embellishment, and mixed media add ons, which of course I couldn't resist and had to have them all!!  Click on the blog link HERE to see all the gorgeous creations from the super talented Design Team and prepare to be inspired.  C'est Magnifique also have a monthly sketch challenge which will be posted on January 1st.   I will have several posts over the next week to share the Sketch Challenge as well as a few more projects.

Have a look at this gorgeous collection.


Kit Paper
FabScraps: Shabbylicious: Shabby Birds
FabScraps: Shabbylicious: Shabby Blues
FabScraps: Shabbylicious: Shabby Chairs
FabScraps: Shabbylicious: Shabby Mix
FabScraps: Shabbylicious: Chic Mix
FabScraps: Shabbylicious: Chic Chairs
FabScraps: Shabbylicious: Chic Pinks
FabScraps: Shabbylicious: Little Darlings
Kit Embellishments
Prima: Chalk Ink: Attic Dust
May Arts: Shear Ribbon with Ruffle Edge: Navy
Prima: Say it in Crystals Swirls: Black
American Crafts: Thickers: Hardcover Black
Prima: Odette: White
Prima: Serenade: Blue
Blue Fern Studios: Chipboard: Enjoy the Journey Title
Maya Road: Granny's Wood Doilies
Prima: Shabby Chic Metal: Illume Treasures Candelabra/Chandelier
The flower add-on includes some beautiful flowers that are the perfect addition to the kit. Included are flowers from Manor House Creations and Prima.

Flower Add-on
Manor House Creations: Glitz: Mixed
Prima: Valentina
Manor House Creations: Ballerina: Classic Mix
Prima: Le Mia: Black/Grey
Manor House Creations: Shimmers: Snow
Manor House Creations: Ashlee: White/Blue


Embellishment Add-on
Blue Fern Studios: Chipboard: Bohemian Butterflies
Heidi Swapp: Color Magic Frames
The Crafters Workshop: 6x6 Template: Mini Microbial
Prima: Junkyard Findings: Rose Heart Corners
Glitz: Teeny Alphas: Gray
Dreaming in Color: Silks Acrylic Glaze: Azure
Maya Road: Ribbon Roses: Pink

The MMM kit is designed to be a mixed media kit that can stand alone. Additionally, it can be used with the monthly kit.

Mixed Media Kit Contents
Luminarte Primary Elements – Bolivian Blue
Luminarte Primary Elements – Chiffon Pink
Luminarte Primary Elements – Tahitian Blue
Silks – African Jade
Silks - Raspberry Wine
Silks Clear Acrylic Glazing Medium
Canvas Corp Stretched Canvas 5x7
Prima: Vintage Mechanicals: Flowers Medium
Prima: Mechanicals: Pendant
Prima: Sunrise Sunset: Mini Roses: Silver
Prima: Le Mia: Cotton Candy
Prima: Delight Collection: Tags & Tickets
Blue Fern Doily
*some embellishments are partial packages

 Here are a few of my creations made with this gorgeous kit!! Keep an eye out as I have more projects to share.

"So Lovely"

I was in heaven playing with the gorgeous January kit, as it is so beautifully feminine and perfect for my shabby chic style of scrapping. On my 1st LO I had some fun with the Luminarte products from mixed media kit to create a soft and pretty background. Once I figured out the placement of my photo, I adhered the wooden doilies and chipboard alpha letters for my title from the main Kit, and also the silver flowers from the Mixed Media kit, then I coated the embellishments and pp with gesso, leaving some of the pattern visible around the edges of the paper. Once dry, I stamped a few flower branches with the ink from the main Kit, then painted and splattered over the top with African Jade Glaze and Bolivian Blue pigment powder, thinned down with a little water. I also mixed the Bolivian Blue and Tahitian Blue Primary Elements powders to create a lovely blue-mauve colour, and highlighted with the Chiffon Pink.

Items used on this LO: January Kit, Flower Add On, Mixed Media Kit (Luminarte silks and primary elements)
Items from my stash: Pink glitter glass, Stampendous floral branch stamp, paper leaves, Martha Stewart pansy border punch, gesso.

"Remember This Moment"
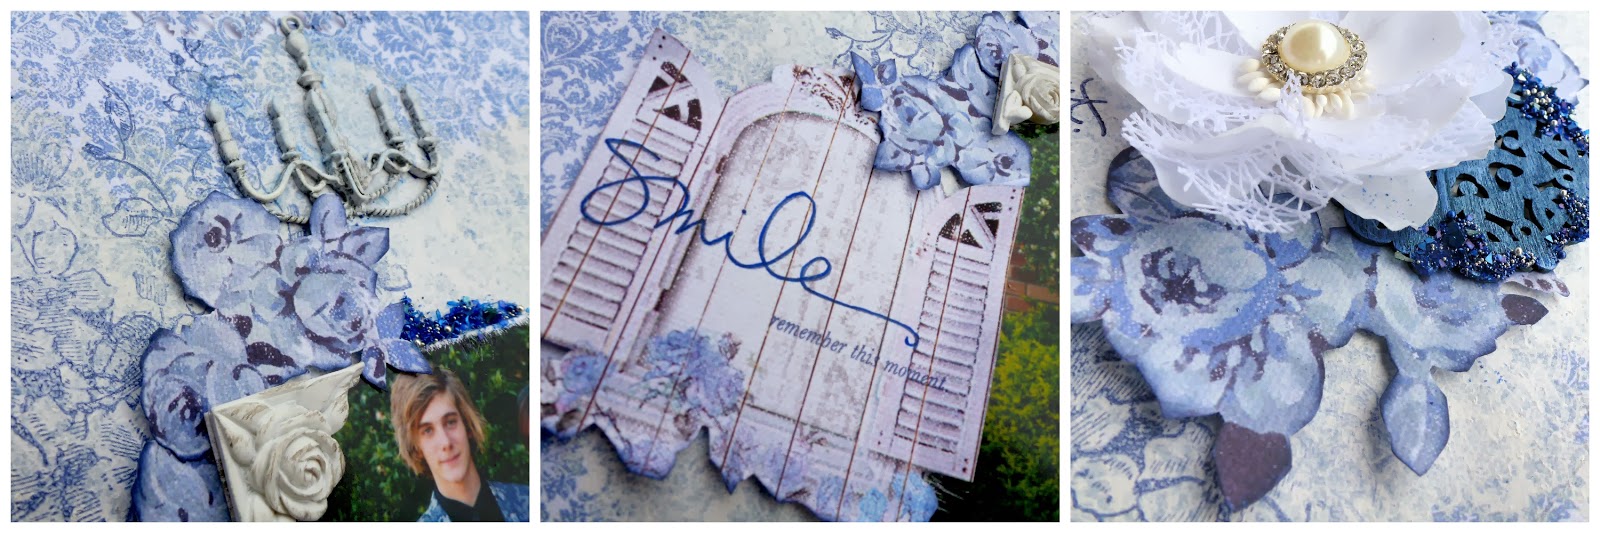
Love these pics of my daughter and her partner at her Senior Formal and they were a perfect fit for the blue tones of the pp's in the Janaury Kit. Kept this fairly simple by softening the pp with some gesso, then overlaying with a couple of different stamped images.  I fussy cut a few elements from the pp, for the flower cluster to frame the photo and highlighted with a touch of glitter glass. I think you can tell I am loving glitter glass at the moment!!

Items used in this LO: January Kit, Embellishment Kit - resin corner, Luminarte Azurite silk paint.
Items from my stash: gesso, stamps, blue and silver glitter glass, Versamagic ink - night sky, Martha Stewart pansy border punch.
"Simple Moments"

This photo of Brittany inspired a pretty and pink LO, with touches of black.  I punched 4 12" strips from the white pp to create a border for the pink gingham paper, stenciled and stamped the background and to add a little twist to my paint splats I used some extra fine glitter glass. To create the glitter glass splats on the background, I mixed the clear glaze with some white pva glue that dries clear and thinned down with water. I then splattered the background with the medium and while it was wet I coated the splatters with extra fine glitter glass. I love to recycle, and found the black packaging from the Prima flowers was perfect to use as part of my title.

Items used on this LO: January Kit, Flower Add On, Embellishment Add On - pink rose trim. Mixed Media Kit - clear glaze, Chiffon Pink Primary Elements.
Items from my stash: Crafters Workshop stencil, paper doily, silk leaves, EK Success border punch, stamps, gesso, pink glitter glass, Lindy's Stamp Gang Saltwater Taffy mist, Tim Holtz black soot distress ink.

Thanks so much for stopping by.

Thursday, November 7, 2013

Manor House Creations - DT LO Spring 2013 Range

Hi Ladies,
I can't tell you how excited I was when I received my massive box of goodies from Nerrida at Manor House Creations.  It felt like Christmas when I opened my parcel and saw all the gorgeous flowers and fabulous new "Believe" paper range.  Today I have a LO to share using some of the new product from the Spring 2013 Collection.
Dare to Dream Big


The trellis paper with the centre frame "Us Together" immediately popped out at me when I first saw the new Believe range, and inspired me to create this LO.  I started by trimmimg it down a little around the edges, cut out inner part of the frame, then backed it with a piece of the "Dreams Come True" pp which I masked with a Prima Stencil and gesso, then highlighted with some Luminarte pigment powder.
I love to grunge up my edges, so I punched, distresssed, inked and stamped the edges of the paper and used the reverse side of the "Lace" pp to create a contrast border.   To add a pop of colour I painted the blossoms from the trellis design with Fuzzy Peach Luminarte pigment powder mixed with water, which has a lovely shimmer (it's a not easy to see in the pics), then added another layer of stamping in pink around my edges.
To tone in with the black and white pp's, I altered my photo to black and white and framed it with one of the new ornate scallop frames in black.
Now the flowers - which are all from the gorgeous new Spring range.  I used the pink vinette, these are very versatile as you can cut them up to fit in with your design, the black tea roses and Floral Mix Arielle clustered around the photo and also a smaller cluster on the right.  To add some sparkle I coated the edges of the pink Arielle flowers with diamond dust.
And finally the title, where I used the new flexible words in black.  There are also other words available in black and white.
Manor House Product:  Believe papers, Ornate Scallop Frame, Flexible Word - Dream, Pink Vinette, Black Tea Rose, Floral Mix Arielle

Other Product:  Prima mask, Viva Croco Crackling, Martha Stewart border punch, Green Tara velvet leaves, Kaisercraft flutterbye stamp and bling, Prima rose stamp, Gesso, Luminarte fuzzy peach pigment powder, Diamond Dust, Black glimmermist, Prima vintage pink ink, Tim Holtz distress ink black soot, muslin

Thanks so much for stopping by.

Wednesday, October 9, 2013

Craft Queen - Kaisercraft Lady Rose

Hi Ladies,

I have a LO to share using the gorgeous new range from Kaisercraft called Lady Rose.  I have used the 6 1/2" paper pad and the collectables with some beautiful ribbons and embellishments available from Craft Queen.   Just click on the links in product list below for stock availability. 

The background on this LO was created by spreading some gesso down first, then misting over the gesso with Lindy's Stamp Gang Starburst Mist in Salt Water Taffy, I also flicked some randomly for a bit more depth.  These mists have a beautiful glimmery sheen to them.  Once dry, I used a Prima mask with some gesso.  Finally I had a play with some Luminarte pigment powders.   They have a very deep pigment with a gorgeous shimmer, so a little goes a long way.   I mixed a very small amount with some water in a palette, then picked up the colour with a paint brush and flicked the colours over my background.  The colours used here are Fuzzy Peach, Blushing Rose and Olive Vine.

Once my background was totally dry, I layered the Kaisercraft papers, Collections Elements, trims, to frame my photo, then added a few embellishments.

Keep an eye out, as I have a couple of cards to share using this range as well.


Craft Queen product:
Kaisercraft Lady Rose 6 1/2" paper pad,
Kaisercraft Lady Rose Collectables
Collections vintage butterflies
Collections clock faces
Collections old printed ephemera
Prima Mask 564216
shipping tag
green floral washi tape
round cream pearl embellishment
pink tiny twine
heart ribbon cream
pink and lime double sided ribbon
green organza beaded flower
Tim Holtz Worn Lipstick Distress Ink
Tim Holtz Distress Stain - Pickled Raspberry

Other product: Lindy's Stamp Gang mist Salt Water Taffy, Luminarte pigment powders - olive vine, blushing rose, fuzzy peach, Kaisercraft pp, Bo Bunny and Inkadinkado stamps, Prima lace, acetate, gesso

Thanks so much for stopping by.