Showing posts with label Layout. Show all posts

Wednesday, August 22, 2018

Dusty Attic June Release - Amazing Moments DT Layout

Hi everyone,
Today I am sharing a travel themed layout with a holiday pic from a recent cruise this year for my husbands's 60th birthday, created with June release Dusty Attic chipboard and stencil designs.

"Amazing Moments"

 With so many gorgeous new designs, it's difficult to choose which ones to create with!! but I was drawn to the fabulous new travel border and corner chippies as they are the perfect match for the recently released Mintay Papers - Wanderlust Collection.

To create my background I used the new Burlap Stencil design, with modelling paste which I coloured by mixing with Tim Holtz Distress Oxide reinkers in pistachio mixed with a touch of tumbled glass.


Textured embossing powders are a great way to alter your chipboard.  I used Stampendous shabby pink embossing enamel on the Sand Dollars and Starfish to create texture and Emerald Creek Baked Texture embossing powders on the Travel Borders and Corners.


The Chain Rectangles chipboard frame was altered with Ranger Ancient Gold embossing powder, which looks more like a copper brown and a mixture of WOW verdigris and Stampendous White embossing powders for the Amazing Moments mini caption.


Dusty Attic Product Used
Travel Borders - DA2194
Travel Corners - DA2195
Chain Rectangles - DA2132

Other Product Used:
Mont Marte Light Moulding Paste
Tim Holtz Oxide Reinkers - tumbled glass, pistachio
Kaisercraft Decorative Die - Texture Ragged
Ranger Ancient Gold Embossing Powder
Stampendous Shabby Pink and White embossing enamel
Emerald Creek Ancient Amber, Dirty Sand and Baked Texture
WOW Verdigris Colour Blend embossing powder
 sequin mix

Thanks so much for stopping by.
Happy Crafting

Cathy :)

Friday, May 26, 2017

May Guest Designer for ArtDeco Creations - L'Aquarelle Collection

Hi everyone,  today I am sharing my second post as Guest Designer for Couture Creations for the month of May, creating with the beautiful L'Aquarelle Collection of co-ordinating papers, dies, embossing folders and stamps.

First up I have created a layout using peach and soft brown tones from the collection.

"If You Can Dream It You Can Do It" Layout
I was drawn to the pretty peach/pink and script pp's to create this layout and also fussy cut a few elements from a couple of the papers to create layers around my photo.
I used a few of the Inspiration Cards which I cut apart and tore for a few more layering elements and also my title.  I love to use a sanding block to make my elements pop and give them a shabby/distressed look.

For my background I cut down the peach watercolour pp, sanded the edges and framed it with the beige script pp.  I then layered the torn polka dot Inspiration Cards pieces under the torn bird/script paper and adhered to my background.
To frame my photo I embossed a piece of the peach coloured pp with the Flowering Frame Embossing Folder and lighted sanded over the embossed design.  I also diecut the beautiful Dove in Flight Die from beige pp and backed it with peach pp using the Turbo Glue Pen, then cut around the edges.


The co-ordinating Ornate Metal Flower embellishments can be used as they are, or you can pull them apart like I have to giving you versatility and value for money.

With all the elements created, I layered them to my background using Couture Creations Foam Dots to create dimension.

To finish off, I created a mist by mixing the Couture Creations Mix and Match pigment powders with water and flicked over my layout with a brush, making sure to cover my photo. I used the copper and pearl white and also made a mix of copper with a touch of pearl white, to create an additional softer copper colour.


I couldn't resist the cute little robin, so I decided to create a card using papers from the 12x12 Paper Pad and one of the Inspiration Cards for my greeting.

"Happy Birthday" robin card
To create a pretty border I fussy cut around the floral paper, then used 3D Liquid Pearl Drops in Madagascar to add flower centres.


I also stamped and embossed 2 of the lovely floral cluster stamp from the Fern Flowers and Flourish Stamp Set, cut them apart and layered them under bird to look like it was part of the branch.

To finish off I mixed the pink and pearl white Mix and Match Pigments with water and flicked around the bird to create a softening effect.


I hope you enjoyed my projects created with the beautiful L'Aquarelle Collection.   Make sure to pop in to the Couture Creations Blog to see all the beautiful creations from the Design Team.

Products Used:

Thanks so much for stopping by and happy crafting.

Cathy xx

Friday, May 19, 2017

Guest Design Spot for ArtDeco Creations - L'Aquarelle Collection

Hi everyone, my name is Cathy Cafun and I am so happy to have been invited by Artdeco Creations to be the Guest Designer for the month of May.

A little bit about me:  
I live in Brisbane, Queensland and was introduced to Paper Crafting 11 years ago.  Since then it has become an all-consuming passion and is a large part of my daily life.

If I had to describe my style, I would say it is predominantly shabby chic/romantic, but I am very partial to the grungy distressed look when creating masculine layouts.  My pages, cards and BTP projects always have elements of texture and dimension and I find any form of mixed media, fussy cutting, layering and distressing a wonderful way to achieve this.

I hope I am able to inspire you with my creations using the beautiful L'Aquarelle Collection of co-ordinating papers, dies, embossing folders and stamps.
Today I am sharing a layout and was inspired by the gorgeous purple toned flowers on one of the papers from the 12x12 L'Aquarelle Paper Pad, which has a beautiful array of 24 different flora and fauna vintage themed designs (2 of each design) with lovely co-ordinating watercolour background papers.

"You Are Beautiful Inside and Out" Layout

I started by using the L'Aquarelle Rolling Mesh Stencil design to mask my background with Anna Griffin Embossing Paste, and whilst the embossing paste was still wet I sprinkled with Couture Creations white glitter from the Be Merry Collection, which is superfine and gives a lovely shimmer effect.
For a distressed/shabby look, I tore a section of text print paper, then tore a few smaller mauve pieces to layer underneath, which I embossed with the Antiquity Embossing Folder.  I also used the sanding block to sand the edges of the Inspiration Card.

One of my favourite techniques is fussy cutting, so when I spied these beautiful mauve flowers, they were calling out to be fussy cut.  It is fiddly, but well worth the effort!!  I also fussy cut some stamped and clear embossed fern leaves from the Fern Flowers and Flourish Stamp Set and a butterfly from the Spread Your Wings Stamp Set. 

To add a touch of contrast to my flower clusters and to tie in with the masked background I die cut the Chirping in the Eaves Background Die from white cardstock and cut out the 2 sweet little birds.
I love to add white accents to add a touch of softness to my layouts.  I altered a few of the Jewelled Florettes by adding touches of glue to the edges of the petals, then dusting with white glitter.  I also used the Turbo Glue Pen to adhere some Prills to the flower centres to add a bit of texture. 


"LOVE" Card
The watercolour papers in the collection are so pretty, that I decided to create a card by layering the mauve and aqua green pp's, then sanding the edges for a soft and dreamy look.

To keep in theme with the soft and dreamy look, I diecut the Floral Bunting Background Die to use as a stencil to mask the top right and bottom left of my card.  I then layered one of the Inspiration Cards and a fussy cut butterfly to the centre, then topped the butterfly with a metal embellishment from the Metal Framed Trinkets and Cabochons Pack.
To create a few embellishments for my clusters,  I diecut 2 of the Watercolour Bloom Die in white cardstock, then altered by coating with Madagascar Liquid 3D Pearl Drops mixed with a touch of water.  I also stamped a couple of flowers from the Fern Flower and Flourish Stamp Set in black ink, embossed, then fussy cut.  
To finish off, I used the left over watered down 3D Pearl mix to lightly splatter around the flower clusters.

Products Used:

I hope you enjoyed my 2 projects created with the beautiful L'Aquarelle Collection.  Keep an eye out next week for a couple more projects.

Thanks so much for stopping by and happy crafting.
Cathy


Saturday, July 23, 2016

Blue Fern Attic Charm Collection - The Scrapbook Store

Hi all,

This month for The Scrapbook Store I get to create with the gorgeous Blue Fern Studios Attic Charm Collection and I have a layout to share.

All You Need is Love
 To create this layout I have used the reverse of the 'Calling Cards' pp for my background with the torn section of  the 'Attire' pp over the top and some fussy cut elements from the 'Mercantile' and 'Calling Cards' pp.
Blue Fern Studios have released these pretty rose flower packs.  I used the soft pink one from the pack and teamed it with a couple of daisies from the Blue Fern daisy flower pack and Green Tara cherry blossoms.
The Blue Fern Floral Lattice Bits chipboard was used on my background and altered by embossing with Lindy's Stamp Gang C'est La Vie Cerise for a gorgeous glossy finish.  I then randomly glued some seed beads in amongst the lattice bits.

To create my title I have stamped a sentiment from the Kaisercraft Together Sentiment Stamp Set onto the bottom strip of the pp which I have recycled, as well as the cute stitched heart stamp from the Gabrielle Pollaco - Gabis Circle Stitch Stamp Set.

TSS Products Used:
Other Product: seed beads, lace, brads, ink

Thanks so much for stopping by :)

Friday, July 8, 2016

The Scrapbook Store - Blue Fern Studios Attic Charm Collection

Hi Everyone,
Today I am sharing my second layout for The Scrapbook Store using the gorgeous Blue Fern Studios Attic Charm Collection.

A few months ago my beautiful furbaby Millie passed away, and I have only just recently been able to look at photos of her, as they always made me feel so sad.  I miss having her around me and being my constant companion.  This photo evokes memories of her always wanting to snuggle up beside me on the couch and start her rumbling and comforting purr, which would always lift my spirits when I was feeling a bit blue.
Treasure the Memories
I have chosen to go for soft, sweet and simple on this layout, so that Millie would be the focus of my page.

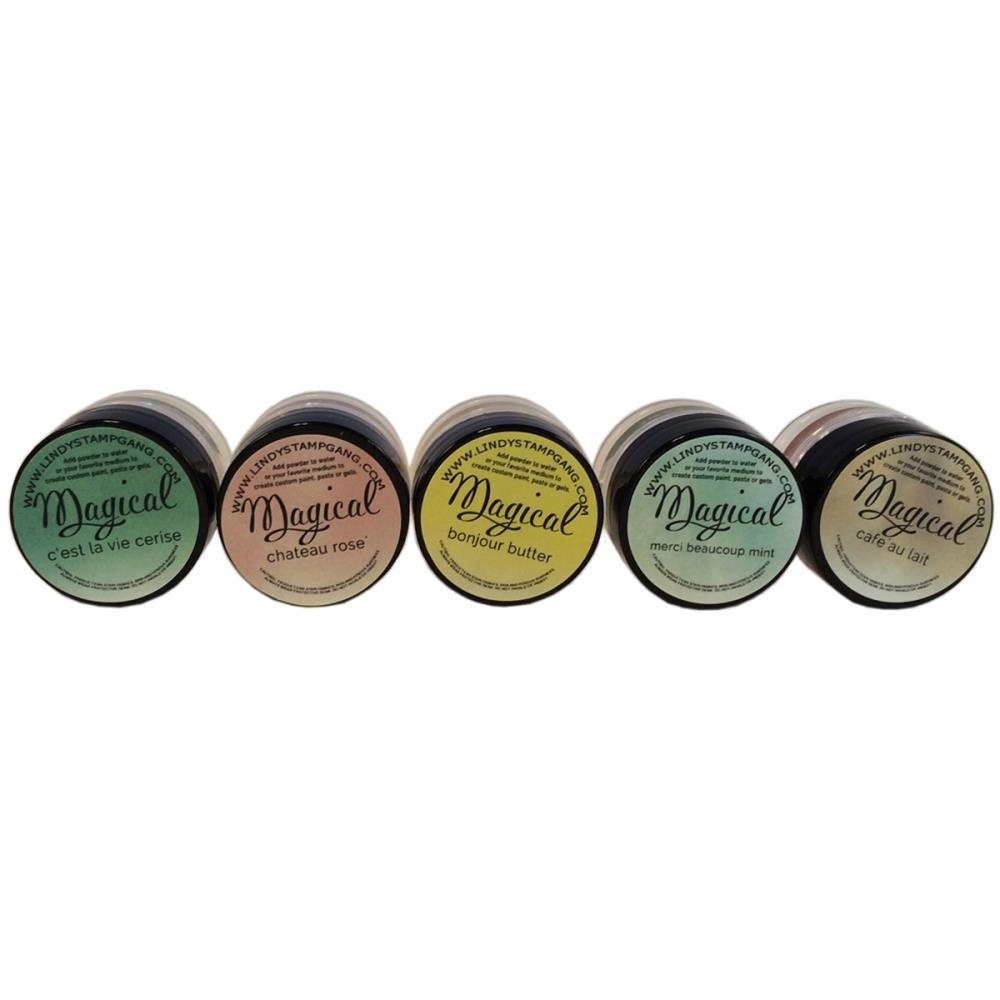
The background of the Blue Fern 'Mercantile' pp was given a coat of Liquitex clear gesso, then I have used the chateau rose and bonjour butter magicals from the Lindys Tres Chic Set to create a soft watercolour effect, which once dry I masked over the top with a Prima stencil and Faber Castell gesso.
The beautiful Blue Fern Studios Jewelled chipboard frame and Spring Trinkets were coated with gesso, and some of the dangling pieces were cut off and rearranged.  I highlighted sections of the chipboard with the the bonjour butter magicals and the chipboard flowers with Kaisercraft snow white pearls.

I am loving the new Blue Fern Studios daisies.  They come in a pack of 9 pretty colours.  I have chosen the soft yellow and peach and teamed them with a couple of Green Tara mini blossoms.
To create my title, I cut out some of the words from the Blue Fern Studios 'Calling Cards' pp which I edged with a little of the Chateau Rose magicals and popped onto some foam tape.
Lastly I have cut up the Kaisercraft pearl strips and used them to frame my background and tie in with the pearl centres of my flowers.

TSS Products Used:

Other Product: mini rosebuds

Thanks so much for stopping by :)